EMC UnityVSA with SRM configuration

I am not going to get into the details of setting up SRM and ECM Unity this is very well documented so the information I will provide is after SRM is installed and configured on vCenter and EMC Unity is installed and configured.

Previous blog post shows UnityVSA setup:
https://virtualrealization.blogspot.com/2016/05/how-to-emc-unityvsa-installation-and.html

EMC UnityVSA:

I already have my pools and LUN’s configured on both Unity virtual storage appliances.
Firstly we want to setup an interface for replication on both Unity VSA’s.
In Unisphere select Data protection -> Replication
Select Interfaces
Click + sign

Select Ethernet Port and provide IP address information.

click OK

Now lets configure the remote connections between Unity arrays.
In Unisphere select Data protection -> Replication
Select Connections
Click + sign

Enter Replication connection information for your remote Unity VSA.
Asynchronous is the only supported method for the Unity VSA.

Click OK.
Select the remote system and click “Verify and Update” to make sure everything is working correctly.

Now lets go ahead and setup the Consistency groups.
In Unisphere select Storage -> Block
Select Consistency Groups
Click + sign

Provide name

Configure your LUN’s.  You have to create a minimum on 1 LUN but you can later add your existing LUN’s to this consistency group if that is required.

Click + to Configure access

Add initiators

Create Snapshot schedule

Specify replication mode and RPO

Specify destination

Click Finish

Now that we have replication configured we can go to vCenter and configure SRM.

SRM:
I already have my EMC Unity Block SRA installed on my SRM server. My mappings is also configured within each site so we will skip this.

Open vCenter server and select Site recovery.
Select each site -> Monitor -> SRA’s
Select rescan all SRA’s
Verify that EMC Unity Block SRA is available.

Let’s configure Array Base Replication.
Select Site recovery
Select Inventories -> Double click Array Base Replication
Select “Add array manager”
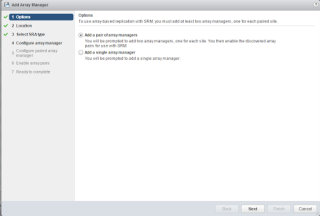
On popup wizard select “Add a pair or array managers”
Select location

Select Storage replication adapter, EMC Unity Block SRA

Configure Array manager

Configure array manager pair for secondary site.

Enable the pairs

Click Finish

Verify Status is OK

Click on each storage array and verify no errors and that you can see the local devices being replicated.

Now we can setup the protection group
Select Site recovery
Select Inventories -> Protection Groups
Select “Create Protection group”
Enter name

Select protection group direction and type. For this we will select array base replication with datastore groups.

Select datastore groups

This will provide information on the VM’s which will be protected.

Click Finish
Verify protection status is OK

Finally you can configured your Replication plan:
Select Site recovery
Select Inventories -> Recovery Plans
Select “Create Recovery plan”
Enter name


Select recovery site
Select protection group

Select network to be used for running tests of the plan.
Click Finish

You can now test your recovery plan.

EMC UnityVSA : adding LDAP authentication

Here are the steps to setup LDAP authentication for EMC UnityVSA.

Login to Unisphere.
Select the cog in top right hand corner to open settings.
Select Users and Groups -> Directory Services
Enter LDAP server information

Click Apply
Click Verify Connection
If successful, Select Advanced
This is recommended since otherwise you will run into problems with assigned users and groups since a default user and group search path created for domain is “cn=Users,dc=domain,dc=com” which in most cases will not fit in your company’s AD structure.

Click Ok
Click Apply
Select Users and Groups -> User management
Click + Sign

Select User or Group type
Select LDAP User

Enter username.  Wish validation could have taken place for LDAP user or group at this point and not after entering all information.
Enter role
Click Finish

EMC UnityVSA installation and configuration

I am currently testing SRM and installed Nimble as my virtual storage array with Nimble SRA 3.0 but having to many problems with getting the array pairs working correct so decided to setup UnityVSA community addition which is available for free with up to 4TB of data.  At the bottom of the page I provided some useful links:

Installation:
first off lets review requirements:

  • vCenter 5.5 update and later.
  • ESXi 5.x and later
  • 12GB Memory
  • 2 vCPU
Deploy the OVA downloaded “UnityVSA-4.0.0.7329527.ova”.
I am not going to provide the steps to deploy and OVA since this is pretty straight forward and nothing really to configure except for management and data ports and management IP address.
After deployment is completed and VM powered on, open a browser and point to IP address specified during OVF deployment.
You will be presented with a login screen.
Type admin / Password123#
Wizard will appear for initial configuration.
Specify password to replace the default.
You need to request the license file by providing the System UUID to the following website: 
Download the license file and install it.
Enter DNS information
Enter NTP information
Pools can be configured here but you do you require a manually created VM disk.  If you have not added the new disk within vCenter for the VM then I would recommend just skipping this step for now.
Enter SMTP information
Create iSCSI network interface.  
This can also be performed later but I created this on the data network ports i specified during the OVF deployment.
Creating NAS server but this can be done at later time.
Initial setup is now completed, yay!

Setup Pool:
Next step is to setup your storage to used by the UnityVSA.  
This is very easily accomplished through vCenter server. 
Edit settings on the UnityVSA VM
Select new device “New Hard disk” and click Add
Create hard disk with following recommended settings:
  • SCSI controller 0 which is VMware Paravirtual
  • Thick provision eager zero
  • Max size of 4TB
  • Min size of 10GB
  • Connect up to maximum of 12 disks for user data
Wait 60 seconds for UnityVSA to recognize the new storage.
Now we can setup our Pool
Select Storage -> Pools
Select + to create new pool
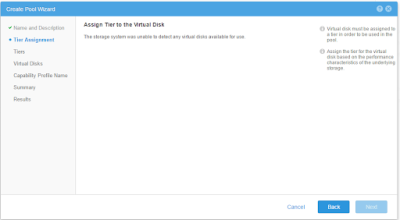
Select the newly create disk, and make sure to select the storage tier.  After select the Storage tier, press either enter or anywhere else on screen to make the Next button available.
check box for storage tier
Select virtual disks
Create Capability profile.  This is a set of storage capabilities for VVol datastore.  The capabilities are derived from the underlying pools so best practices is to configure it during pool creation.  Capabilities needs to be created before you can create a VVol datastore.
Specify Tag.  Usage tags can be applied to capability profiles to designate them and their associated VVol datastores for a particular use
Setup initiators:
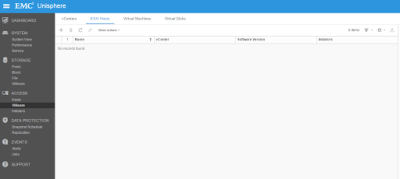
Select Access -> VMware
You have some options here to either directly connect and configure the ESXi hosts or connect directly to vCenter server and select which ever ESXi hosts within the environment you want to setup initiator access for.  I selected the latter since easier to connect to vCenter.
Enter vCenter information
Select the ESXi hosts.
Click Finish
To verify the added ESXi hosts you can select Access -> Initiators.  Here you can review your which will import both FC and iSCSI protocols if configured on hosts.
Setup LUN:
Enter name
Select the Pool previous created and size of LUN
Click + to Select initiators for access
Create snapshot schedule  (this is a very welcome addition since was lacking in VNX)
Setup replication.  I will be adding another blog shortly to setup replication between two UnityVSA and using VMware SRM.
Finish

Hopefully get some time here shortly to work on setting up SRM with Unity so stay tuned.

Links: